
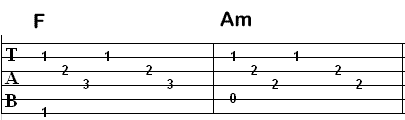
Before we get into any other exercises. You should all know how to play Am, C, D, and F and Em.
The progression I want you to play is the following: Am, C, D, F, Am, C, and Em! Play each chord
with a down and up stroke, another down and up stroke. So each chord should be played 4 times. Play
the progression over and over until you have these chords down and where your not making any mistakes.
medium speed
The score would look like this:
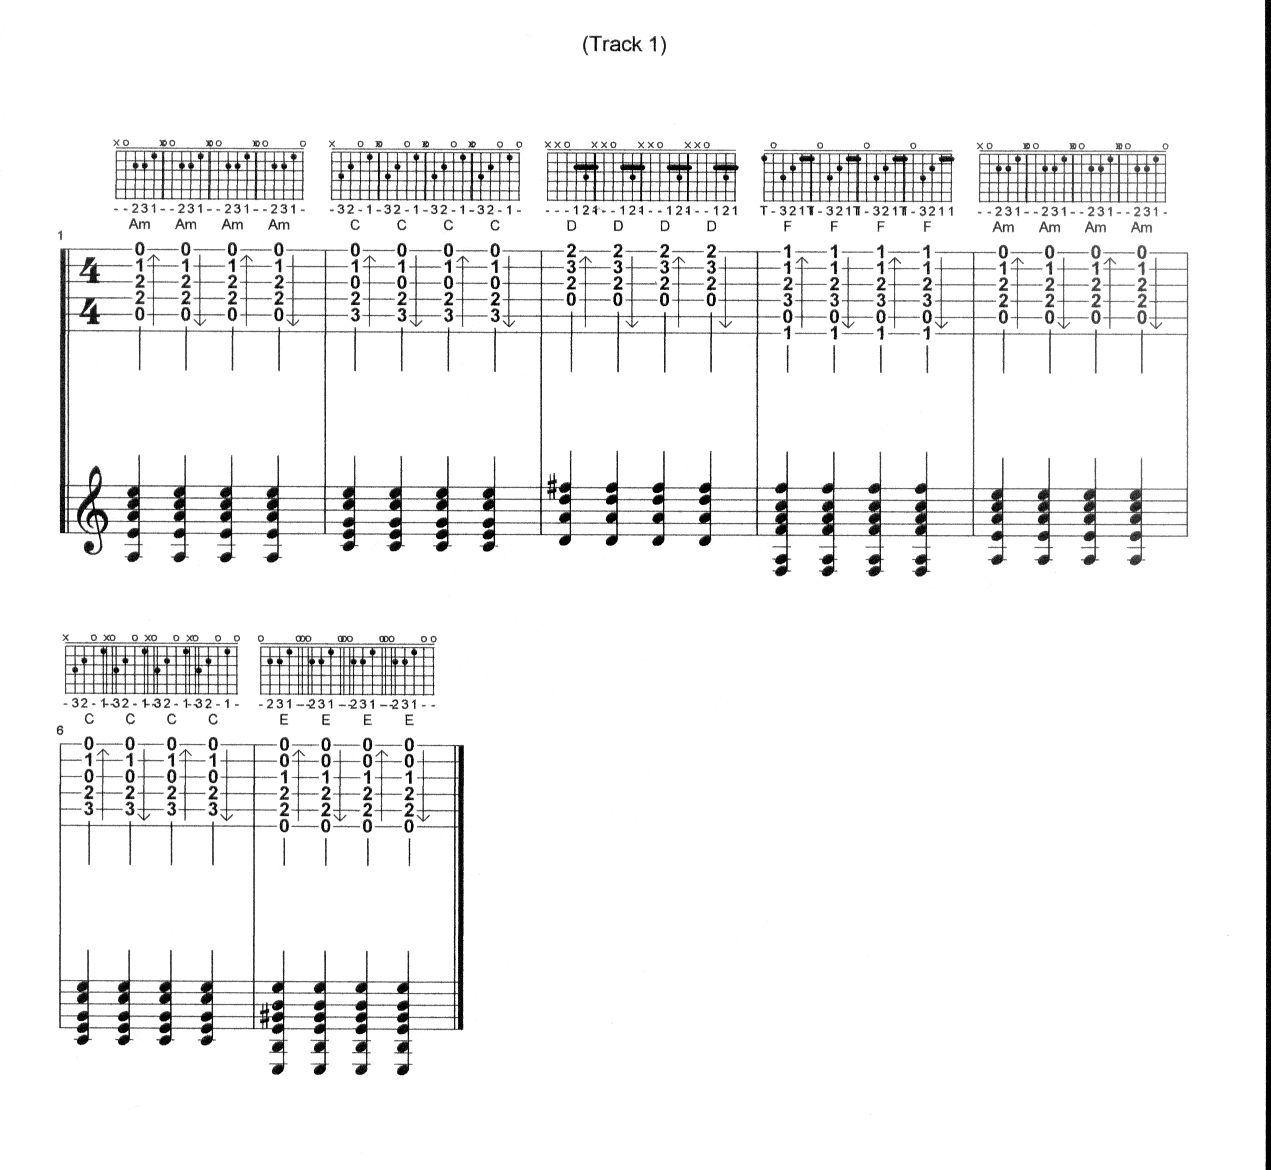
I believe it is more fun when practicing, to play something that is useful and of course fun to do. The
chords that I have just played are chords that you play to the HOUSE OF THE RISING SUN! Of course
there is more to it, but we will get to everything eventually. Get these chords down where they sound
clean and where you can play all of them without making any mistakes. Next, we will start learning
how to finger pick the rythem! It will take some time, but you should be able to learn these chords and
the struming in less then a week.
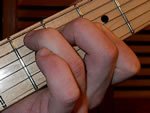
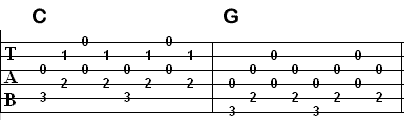
Look at this picture and see where your fingers should be:

The basic rules are:
1. Your thumb playes the 3 base notes, Strings 4, 5, and 6.
2. Your index finger usually only plays the 3rd string.
3. Your middle finger usually only plays the 2nd string.
4. Your ring finger usually only plays the 1st string.
Your pinky finger is very rarily used, so don't worry about your pinky for in these exercises.
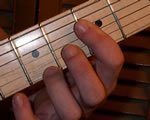
If you bend your wrist a little, you'll find your hand in the best position to start finger picking. You can see that the thumb, index, middle and ring fingers fall naturally onto the strings. This may feel a little uncomfortable for a while but will soon become a habit... a good habit.
Playing repetitive patterns is the only way of learning finger picking, but what you're after eventually is to be able to play anything at all at any time, forgetting all patterns.
Ok once you have the chords down and you can play them all in the order I gave you (Am, C, D, F, Am, C, and Em). Your ready to proceed to the next phase. Strum each chord (downward) then using your ring
finger in an upwardly manner and strike the 6th string; then using your middle finger striking the 2nd
string again in an upwardly manner then using index finger striking the 3rd string in a upward
manner. Now practice playing all the chords in the same manner. Strum downward then pick 1st, 2nd, and, 3rd string as mentioned. This will take some time to get use to. However, this will be your start in
learning how to finger pick!
To learn the basics of finger picking should not take you all that long to learn. In just a few hours
you should be able to catch on and then just work on being able to hit the strings with the proper
fingering until the sounds of each string are heard clearly and cleanly! You do not want to watch
your fingers. Practice without looking. You want to have your fingers REMEMBER the positions. This
is called FINGER MEMORY! Feel the strings with your fingers don't look at them. Just feel, your
fingers will soon memorize where they should be. In less then a week you should be able to play
these chords and finger pick them with ease!
Finger picking is what many people would love to do! I'm no different so I
hope many of us can learn finger picking together. You can pick with one (1) finger or you can
pick with all your fingers and your thumb! After you get the above exercise cleanly then go on to
the next exercises. Everything takes time and practice. I was lazy myself until I started working on this web page. Now I am forcing myself to practice these exercises at least 1/2 hour every day. I hope you will as well.
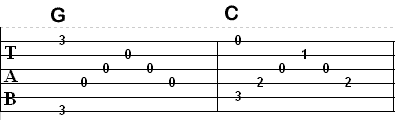
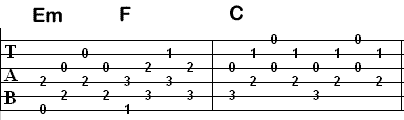
Basic Finger Picking Exercise 1
This one should be easy to play even if you've never fingerpicked before!
The piece consists of only two chord shapes: G and C. You can hold these chord patterns and let your picking fingers do all the work.
Pick the bass notes (lowest note of the chord voicing) with your thumb and the notes on the high e string with your 4th finger (pinky).
You'll want to use your 1st finger for the notes on the D string, 2nd finger for notes on the G strings, and 3rd finger for notes on the B string.
TIP: You can come up with your own variations. Try throwing a D chord in there somewhere, or a E minor chord. Just keep the fingerpicking pattern the same.Play It!
regular speed
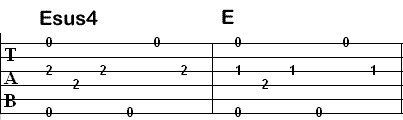
Basic Finger Picking Exercise 2

regular speed
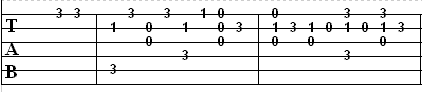
Basic Finger Picking Exercise 3
regular speed
Basic Finger Picking Exercise 4
regular speed
Basic Finger Picking Exercise 5

regular speed